
Caring for a loved one at home often brings a unique set of challenges, particularly when managing personal hygiene needs like changing adult diapers. For many new caregivers, this task can feel daunting, leading to uncertainty about proper techniques, essential supplies, and ensuring patient comfort. Fortunately, mastering this skill is entirely achievable with the right guidance and practice.
The video above provides a fantastic visual demonstration, offering practical steps to confidently change adult diapers. This accompanying guide expands on those vital instructions, offering deeper insights and additional tips to make the process smoother, more hygienic, and ultimately, more respectful for both the caregiver and the individual receiving care.
Understanding When and Why to Change Adult Diapers
Knowing the optimal time for adult diaper changing is crucial for maintaining proper hygiene and preventing skin irritation. The general guideline suggests changing soiled diapers immediately and wet ones at least every four to six hours. However, individual circumstances may necessitate more frequent changes.
- **Fecal Soiling:** Always change diapers soiled with feces right away. Prolonged contact with stool can quickly lead to skin breakdown and infections.
- **Urine Saturation:** Even if not completely saturated, a diaper used for four to six hours should be changed. This timeframe helps prevent moisture-associated skin damage, reduces odor, and maintains dignity.
- **Fluid Intake and Medication:** Consider the person’s fluid intake and any medications, such as diuretics, which might increase urine output, requiring more frequent checks and changes.
- **Patient Comfort:** Always prioritize the comfort and skin integrity of the individual. Imagine if you wore a wet diaper; you would certainly want it changed promptly.
Regular diaper changes are not just about cleanliness; they are a fundamental aspect of preventive care. Preventing pressure sores, managing odors, and fostering a sense of well-being all hinge on consistent and timely hygiene practices.
Essential Supplies for Efficient Diaper Changing
Preparation is key to a smooth and respectful adult diaper changing process. Having all your supplies within reach before you begin helps minimize discomfort for the patient and reduces the risk of contamination. Here is a comprehensive list of what you will need:
- **New Adult Diapers:** Always have the correct size and absorbency level ready. Brands like Tena offer various options tailored to different needs.
- **Disposable Gloves:** Essential for your hygiene and to prevent the spread of germs. Always use a new pair for each change.
- **Wipes:** Opt for gentle, pre-moistened wipes, preferably unscented, to clean the skin effectively without causing irritation.
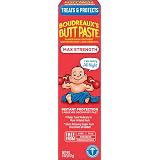
- **Barrier Cream (Zinc Cream or Petroleum Jelly):** A crucial step to protect the skin from moisture and irritation. Zinc-based creams are excellent for forming a protective layer.
- **Disposable Underpad (Chux Pad):** Place this underneath the patient to protect the bed linens from any leaks or spills during the change.
- **Plastic Waste Bag with Tie Handles:** For sanitary disposal of soiled diapers and wipes, helping to contain odors effectively.
- **Warm Water and Washcloth (Optional):** Some caregivers prefer using a washcloth with warm water and mild soap for thorough cleaning, especially for very sensitive skin.
Setting up your changing station with these items ensures you are ready to complete the task efficiently and hygienically. This organized approach also conveys professionalism and care to your loved one.
Step-by-Step Guide to Changing Adult Diapers
The video demonstrates a clear, effective method for changing adult diapers. Here, we delve deeper into each step, offering additional insights for a comprehensive understanding.
1. Preparing the Environment and Communicating
Before you begin, ensure the room is warm enough and well-lit. Maintain open communication with your loved one, explaining each step you are taking. This respects their dignity and can alleviate anxiety.
Imagine if you were the patient; clear communication helps maintain a sense of control and understanding. Gather all your supplies and place them within arm’s reach on a clean surface. Put on your gloves and place an underpad beneath the patient.
2. Carefully Removing the Soiled Diaper
Begin by gently detaching the tapes on both sides of the soiled diaper. To prevent them from sticking to your gloves or the patient’s skin, fold them back onto themselves. Carefully roll the soiled diaper inward, towards the center of the patient’s body, effectively containing any waste.
Next, gently bring the rolled diaper downwards, cleaning the front area with the least soiled part of the diaper or a fresh wipe. Always wipe from front to back to prevent the spread of bacteria, especially in women. Discard this initial soiled portion into your waste bag.
3. Thorough Cleaning and Skin Assessment
Ask the patient to turn gently onto their side, or assist them in rolling over. This allows you access to the back and buttocks area. Use fresh wipes, or a warm washcloth, to thoroughly clean the entire area. Pay close attention to skin folds, as moisture and bacteria can accumulate there.
While cleaning, observe the skin for any signs of redness, rash, irritation, or pressure sores. Early detection of skin issues is critical for prompt treatment and prevention of further complications. Ensure the skin is completely clean and dry before proceeding. Any residual moisture can promote bacterial growth and skin breakdown.
4. Applying Barrier Cream and Final Disposal
Once the skin is clean and dry, apply a generous but even layer of barrier cream, such as zinc cream, to all areas that come into contact with the diaper. This creates a protective shield against moisture and irritants.
Fully roll the old diaper into a compact bundle, ensuring all soiled parts are inside. Place it directly into the disposable waste bag. Remove your gloves by peeling them off inside out, effectively trapping any contaminants, and place them into the waste bag as well. Tie the bag securely and dispose of it in a designated bin immediately to control odors and maintain hygiene.
5. Positioning the New Diaper Correctly
Put on a fresh pair of gloves. Take the new adult diaper. Remember, the side with the brand wording often indicates the front of the diaper, while the tapes are typically at the back. Confirm this by holding it up. Gently slide the new diaper, folded lengthwise, underneath the patient while they are still on their side.
Ensure the front part is positioned correctly between their legs and the back half is tucked securely underneath their buttocks and lower back. The goal is to have the diaper centered and evenly distributed when the patient returns to their back.
6. Securing the Diaper for Comfort and Leakage Prevention
Help your loved one roll gently back onto their back. Pull the front part of the diaper up between their legs. Smooth out any wrinkles in the diaper to prevent discomfort and potential leaks. Bring the back side of the diaper forward, over their hips.
Now, carefully secure the tapes. The video suggests a specific taping method: the bottom tapes should go straight across, while the upper tapes should angle downwards. This technique is particularly effective in creating a snug fit around the legs and waist, which is vital for preventing leakage, especially at the back, and ensuring the absorbent core sits correctly.
Confirm the diaper is snug but not too tight. You should be able to comfortably fit two fingers under the waistband. If the diaper is too loose, it will leak; if it’s too tight, it can cause discomfort, skin irritation, and restrict blood flow. Finally, pull up the patient’s clothing, ensuring they are comfortable and their dignity is maintained.
Beyond the Diaper Change: Holistic Incontinence Management
Mastering the physical act of changing adult diapers is a significant achievement for any caregiver. However, effective incontinence management extends beyond the diaper change itself. Consider these additional aspects for comprehensive care:
- **Scheduled Toileting:** For individuals with some mobility or cognitive awareness, establishing a regular toileting schedule can significantly reduce the frequency of diaper changes and promote independence.
- **Fluid Management:** Encourage adequate fluid intake to prevent concentrated urine, which can irritate the bladder. However, monitor intake times, potentially reducing fluids before bedtime to minimize nighttime incidents.
- **Dietary Considerations:** Certain foods and beverages can irritate the bladder or contribute to constipation, which in turn can exacerbate incontinence. Discuss dietary adjustments with a healthcare professional.
- **Skin Health Monitoring:** Continuously monitor the skin for any changes. Even with the best care, skin can become fragile. Look for persistent redness, blisters, or broken skin, which require immediate attention.
- **Environmental Adaptations:** Ensure the pathway to the toilet is clear, well-lit, and easily accessible if the patient can ambulate. A commode might be helpful if the bathroom is too far.
- **Professional Support:** Do not hesitate to consult with healthcare professionals, such as a geriatric nurse or doctor. They can offer personalized advice, assess underlying causes of incontinence, and recommend suitable products or interventions. Resources like Tena’s Caring 101 Handbook can also provide valuable insights and support for home caregivers managing changing adult diapers.
Becoming confident in changing adult diapers is a journey that improves with practice and a compassionate approach. Every caregiver develops their own rhythm, but these guidelines, combined with the video’s practical demonstration, provide a robust foundation for providing excellent care.
Making Adult Diaper Changes Easier: Your Questions Answered
How often should adult diapers be changed?
Soiled diapers should always be changed immediately. Wet diapers should be changed at least every four to six hours to maintain hygiene and prevent skin irritation.
What essential supplies do I need before changing an adult diaper?
You will need a new adult diaper, disposable gloves, gentle wipes, a barrier cream, a disposable underpad (chux pad), and a plastic waste bag. Having these items ready ensures a smooth and hygienic process.
Why is it important to use barrier cream when changing an adult diaper?
Barrier cream, such as zinc cream, is important because it creates a protective shield on the skin. This shield helps to guard against moisture and irritation, which can lead to skin breakdown.
How can I make sure the new adult diaper fits correctly to prevent leaks?
To ensure a correct fit, the diaper should be snug but not too tight, allowing two fingers under the waistband. Smoothing out wrinkles and using the recommended taping method (bottom tapes straight, upper tapes angled down) helps create a secure seal.